
0 item(s)
View cart
You have no items in your shopping cart.

If you have just started using an ostomy pouch, the process of changing it can be overwhelming. Here, we’ve put together a guideline that breaks the process down into more manageable steps.
Step 1. Wash your hands.
Step 2. Lay out your ostomy supplies so that they are all within easy reach of you.
Step 3. Empty your pouch while sitting on the toilet as you usually would. Do not rinse your pouch out while emptying as this will only reduce its adhesive properties.
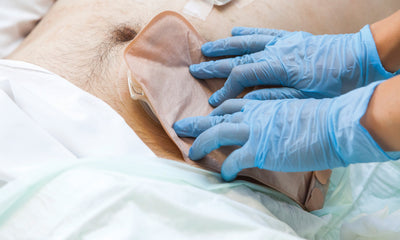
Step 4. While holding the corner of the tape attaching the pouch to your body, push your skin inwards to remove the pouch. The adhesive remover comes in handy here if you have worn your skin barrier wafer for a short period of time and the adhesion is still strong or your skin is in a state where it is prone to damage.
Step 5. Dispose of the old pouch, wafer and any other waste into a plastic bag. Do not dispose of the tail clip.
Step 6. Clean the area around the stoma with a washcloth and warm water. Be gentle and refrain from using scented creams or soaps as they will compromise the adhesive properties of your pouch.
Step 7. Pat your skin dry, or use the hair dryer on a low setting for the best results.
Step 8. Measure your stoma with a guide. Use the make-up mirror so that you can have a better angle to view.
Step 9. Trace the correct size and shape of your stoma on the back of the wafer by drawing a starter hole in the center. Use your scissors to cut out the hole. (Certain new moldable skin barriers do not need you to actually perform any cutting; they can be easily manipulated to create an opening of the correct size.)
Step 10. If you are using a paste, peel the paper away from the wafer and apply the paste using only the width of the tube’s opening onto the cut circle in the wafer. Let the alcohol evaporate for 30 seconds. Do not be too worried if your paste is not particularly adhesive; it is merely caulking.
Step 11. Lean backward to smooth your skin out, while removing the paper backing from the skin barrier. Apply it gently and carefully over your stoma. Remove the paper backing from the surrounding tape and smooth it down over your skin, ensuring that you do not create any wrinkles.
Step 12. Snap the new pouch onto the wafer if you are using a two-piece system. Do not tug down on the appliance to ensure that is secure; instead, feel this out with your fingers.
Step 13. If you are using a tail clip, apply it now. After doing so, hold your pouch in place with your hand for five minutes to give the seal time to secure.
While some bleeding is normal while touching your stoma, you should report any abnormal bleeding, size, shape or color to your nurse. Be gentle during the process of changing your ostomy pouch to avoid any damage to your skin.
| Product | Price | Quantity | Actions | ||
|---|---|---|---|---|---|
| Features |
| Availability: |
| Price |
| Options |
| Actions |

 By Express Med